Reading & Development: 2 hours
Overview
Your software must perform lookups for Individual Healthcare Identifiers (IHIs) for patients. Lookups are necessary when registering new patients, updating patient details in the local system, and under other specific circumstances. This can be done in batch, or individually. This page will walk through the steps required to execute an IHI lookup. The example provided will focus on individual patient IHI lookups.
To perform an IHI lookup, send patient demographics (e.g., Name, Sex, DOB and an identifier such as Medicare card number, DVA number, IHI or mobile number) to the web service and receive an IHI or information as to why an IHI could not be returned. Store the IHI in the local system to maintain a unique identifier for each patient.
The example includes:
- Creating a sample Windows Forms Application and setting up the required libraries for Healthcare Identifiers Service integration.
- Conducting IHI Lookups with the Healthcare Identifiers Service for two use cases: adding a new patient to the local system (UC.010) and updating a patient in the local system (UC.015).
- Understanding select test cases from the conformance test specifications.
Important!
This document provides an example of executing an IHI lookup using the Agency’s .NET library. It should be noted that this is for demonstration purpose and should not be taken as design advice.
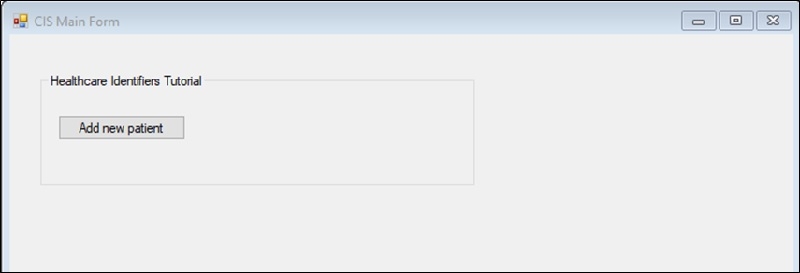
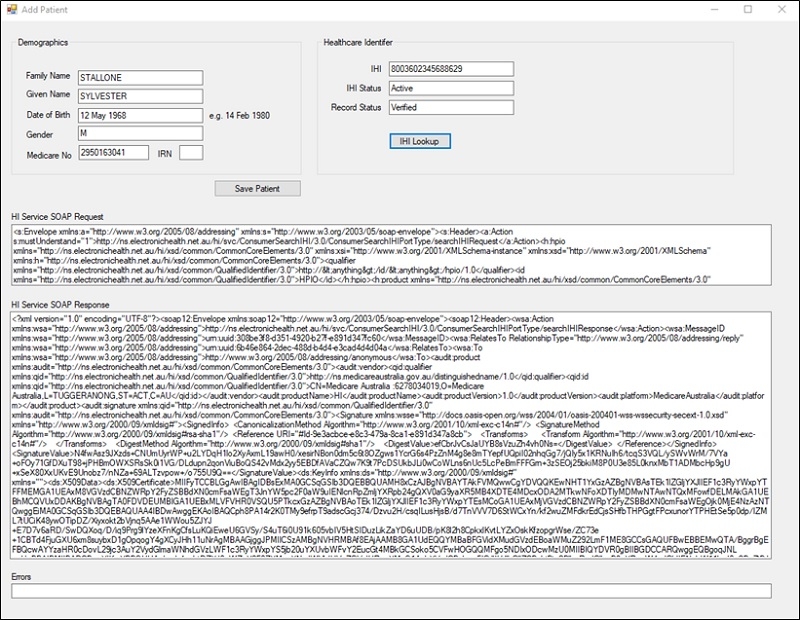
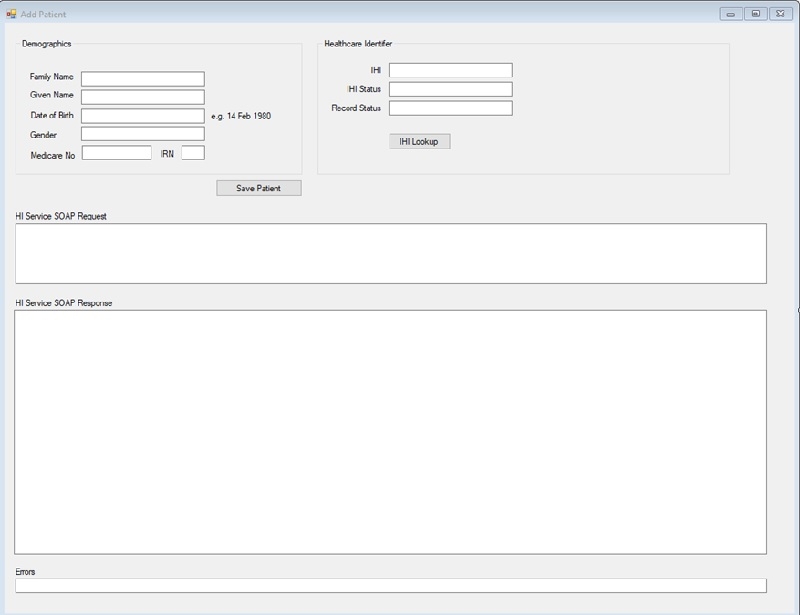
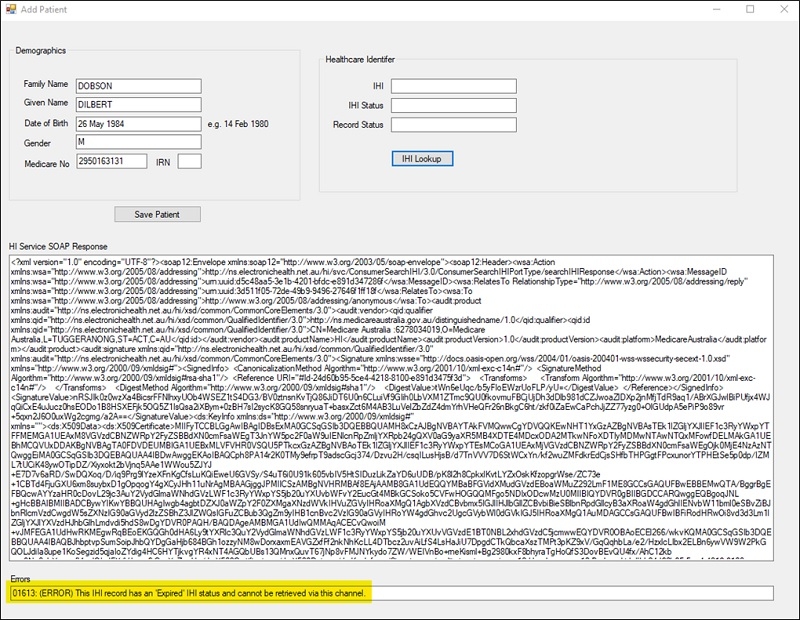
This guide will lead to the creation of a UI similar to the two screenshots provided below. The completed software will include a section similar to the Healthcare Identifier panel in the second screenshot below. The bottom half of the form in the second screenshot is for testing purposes only.
Use Cases, Test Cases
When developing to connect to the Healthcare Identifiers (HI) HI Service it is important to consider which Use Cases you are conforming to. This will assist you later with testing. This developer guide will walk you through 2 important Use Cases. For a complete list you can review HI Service Use Cases;
- UC.010 (adding a new patient in your local system and retrieving their IHI), and
- UC.015 (updating patient details in your local system and revalidating their IHI).
Both Use Cases are very similar and can be fulfilled by the same HI Service web service (For a complete understanding of the web service please refer to the “HI.TECH.SIS.06 - IHI Inquiry Search via B2B” specification accessed via Services Australia as part of the HI Licenced Material).
Important!
This developer guide will also refer to a My Health Record requirement to revalidate IHIs. More information is provided in Step 7: Workflow
The next developer guide will focus on;
- UC.131 (searching for a provider individual’s HPI-I).
Each of the Use Cases above have Test Cases which you will need to pass, this guide will discuss some of the more difficult test cases.
Prerequisites
- Visual Studio (2010 – 2019)
- GIT Source Control (If you are cloning sample code from GitHub using GIT)
- Sample code available on GitHub and Australian Digital Health Website.
https://github.com/AuDigitalHealth/hi-b2b-client-dotnet
Open Source Sample Code Directory - GitHub and NuGet - Test certificates (see the previous guide - Introduction - My Health Record - B2B Developer Guides)
More Information
Example works with .NET Framework 4.0+ to the latest version
Step 1: Create a new application
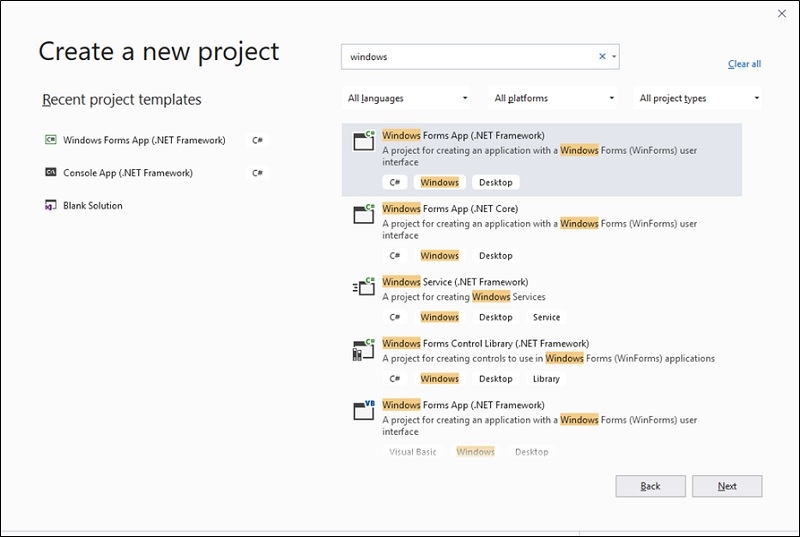
Step 1.1. From the Visual Studio File menu, select New > Project.
Step 1.2. Create a new Windows Forms Application using .NET Framework and select Next.
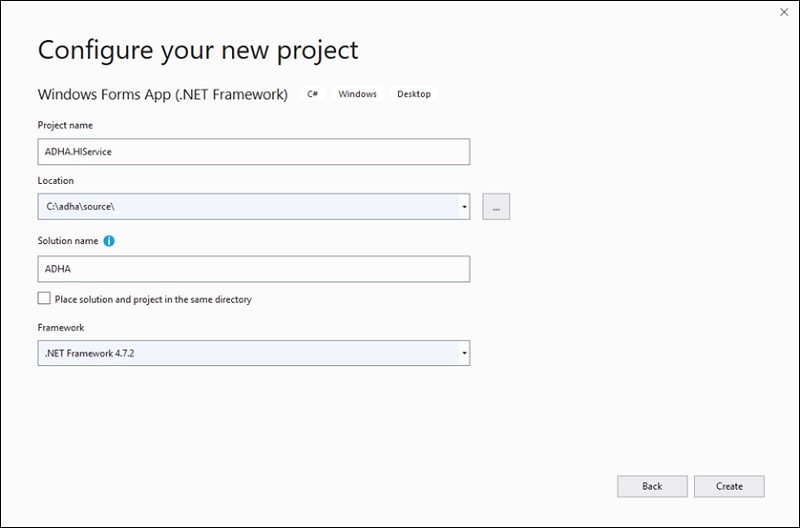
Step 1.3. Enter the Project and solution name as per your preference & click Create.
Step 2: Set up client libraries and NuGet packages
You can install libraries using Package Manager Console or Manage NuGet Packages Solution Screen. In this guide, we will be installing libraries using Package Manager Console.
Step 2.1. From the Tools menu, select NuGet Package Manager > Package Manager Console.
Step 2.2. Copy the commands one by one and paste on Package Manager Console and hit enter to install each of library
Install-Package Nehta.VendorLibrary.Common

Install-Package Nehta.VendorLibrary.HI 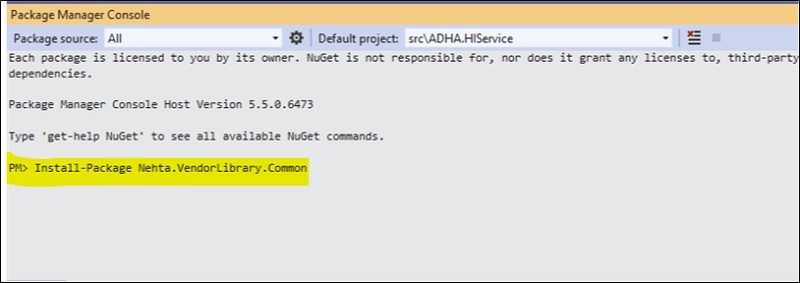
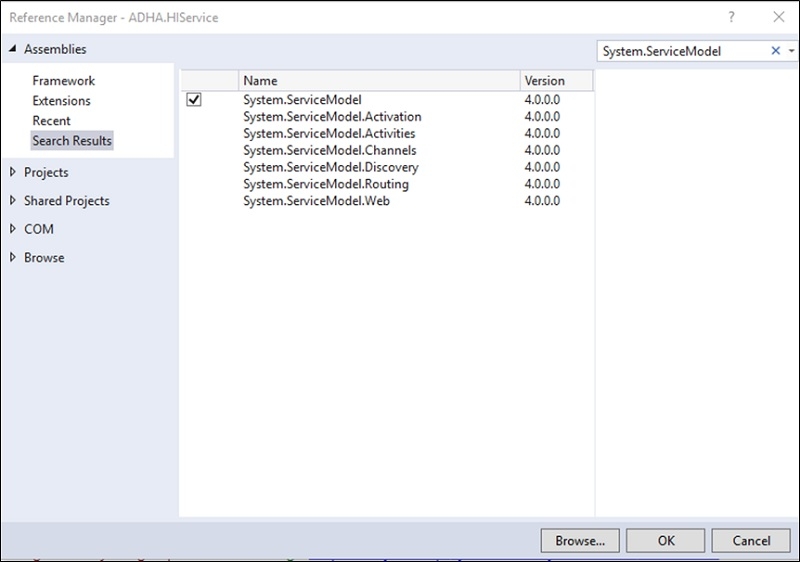
Step 2.3. With these libraries, we require an additional library called System.ServiceModel available from .NET Framework. Right click on References and click Add Reference and Type “System.ServiceModel” inside the search box of Reference Manager windows, check the System.ServiceModel and OK.
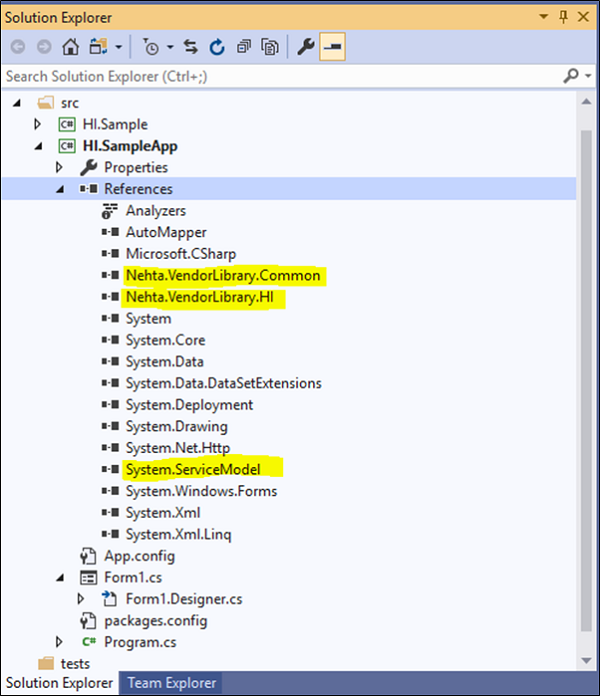
Step 2.4. After installing the HI Services libraries, Project references should have the libraries as per the screenshot below.
Step 3: Prepare an “Add Patient” form
A new form has been added to the project for Add Patient. Your software will have an existing Patient Details form or similar which you may be using.
Step 3.1. Add a new Windows form called Add Patient with the following fields and name your text fields and buttons appropriately. If you are using an existing form you will need to add the Healthcare Identifier panel and utilise the console or a control to output while testing. Note that this example will look up an IHI using patient demographics and Medicare card number. Other identifiers (such as IHI and DVA number) and patient address can also be used to look up an IHI. Please refer to “HI.TECH.SIS.06 - IHI Inquiry Search via B2B” for more information such as the variations of demographics which can be used.
Step 4: Add code to call an IHI lookup
Step 4.1. Right click on the Add Patient form and click view code to add following namespaces in the class in addition to existing namespaces
using System.ServiceModel;
using System.ServiceModel.Channels;
using System.Security.Cryptography.X509Certificates;
using nehta.mcaR3.ConsumerSearchIHI;
using Nehta.VendorLibrary.Common;
using Nehta.VendorLibrary.HI;
Step 4.2. Double click on the IHI Lookup button to add the following code on button click event. This IHI lookup code will be reused so you would likely build into into a library.
private void btnIHILookup_Click(object sender, EventArgs e)
{
    // Obtain the certificate by serial number
    X509Certificate2 tlsCert = X509CertificateUtil.GetCertificate(
        "YourCertificateNo",
        X509FindType.FindBySerialNumber,
        StoreName.My,
        StoreLocation.CurrentUser,
        true
        );

    // The same certificate is used for signing the request.
    // This certificate will be different to TLS cert for some operations.
    X509Certificate2 signingCert = tlsCert;

    // Set up client product information (PCIN)
    // Values below should be provided by Medicare
    ProductType product = new ProductType()
    {
        platform = "",     			// Can be any value
        productName = "",            	// Provided by Medicare
        productVersion = "",         	// Provided by Medicare
        vendor = new QualifiedId()
        {
            id = "",                   	// Provided by Medicare
            qualifier = "http://ns.electronichealth.net.au/id/hi/vendorid/1.0"  						// Provided by Medicare
        }
    };

    // Set up user identifier details
    QualifiedId user = new QualifiedId()
    {
        id = "User Id",                	// User ID internal to your system
        qualifier = "http://<anything>/id/<anything>/userid/1.0"
	// Eg: http://ns.yourcompany.com.au/id/yoursoftware/userid/1.0
    };

    // Set up organisation identifier details, only required for CSP software. If run as a CSP software, the certificate needs to be a CSP certificate

//QualifiedId hpio = new QualifiedId()
//{
//    id = "", // HPIO internal to your system
//    qualifier = "" // Eg: http://ns.yourcompany.com.au/id/yoursoftware/userid/1.0
//};

    // Instantiate the client
    ConsumerSearchIHIClient client = new ConsumerSearchIHIClient(
        new Uri("https://www5.medicareaustralia.gov.au/cert/soap/services/"),
        product,
        user,
        null, // or hpio if implemented as a CSP software
        signingCert,
        tlsCert);

    // Set up the request IHI
    searchIHI request = new searchIHI();

    request.medicareCardNumber = txtMedicareNo.Text;
    request.dateOfBirth = DateTime.Parse(txtDob.Text);
    request.givenName = txtGivenName.Text;
    request.familyName = txtFamilyName.Text;
    request.familyName = txtFamilyName.Text;
    request.medicareIRN = txtMedicareIRN.Text; // optional. Please provide any value otherwise comment out this code as sending blank IRN in the request returns format error.

// For the sake of simplicity, example use simple text box with the following options.
    // M - Male
    // F - Female
    // I - Intersex or Indeterminate
    // N - No stated.
    // In actual CIS software, Select list / Combo box is used.
    switch (txtGender.Text)
    {
        case "M":
            request.sex = SexType.M;
            break;
        case "F":
            request.sex = SexType.F;
            break;
        case "I":
            request.sex = SexType.I;
            break;
        default:
            request.sex = SexType.N;
            break;
    }

    try
    {
        // Invokes a basic search
        searchIHIResponse ihiResponse = client.BasicMedicareSearch(request);
        string ihiNumber = ihiResponse.searchIHIResult.ihiNumber;
        txtIHINumber.Text = ihiNumber.Substring(ihiNumber.Length-16, 16);
        txtIHIStatus.Text = ihiResponse.searchIHIResult.ihiStatus.ToString();
        txtRecordStatus.Text = ihiResponse.searchIHIResult.ihiRecordStatus.ToString();

        txtSoapRequest.Text = client.SoapMessages.SoapRequest;
        txtSoapResponse.Text = client.SoapMessages.SoapResponse;

    }
    catch (FaultException fex)
    {
        txtError.Text = "";
        txtSoapResponse.Text = "";

        string returnError = "";
        MessageFault fault = fex.CreateMessageFault();

        if (fault.HasDetail)
        {
            ServiceMessagesType error = fault.GetDetail<ServiceMessagesType>();

            //error.serviceMessage.
            // Look at error details in here
            if (error.serviceMessage.Length > 0)
                returnError = error.serviceMessage[0].code + ": " + 		error.serviceMessage[0].reason;
        }

        txtError.Text = returnError;

        // If an error is encountered, client.LastSoapResponse often provides a more
        // detailed description of the error.
        string soapResponse = client.SoapMessages.SoapResponse;
        txtSoapResponse.Text = soapResponse;

    }
    catch (Exception ex)
    {
        txtError.Text = ex.Message;
    }

}
Step 5: Replace the IHI lookup values
For simplicity, some configuration values have been hard-coded in our method. In the next guide, these configuration settings will be added inside the App.Config file.
Step 5.1. Replace the Certificate search value, Product details, and vendor information as provided to you.
| Member | Replace | New Value |
|---|---|---|
| Certificate Details | ||
| X509CertificateUtil.GetCertificate (parameter 1) | “Serial Number” | See the previous guide to locate your certificate Serial Number. |
| Organisation Details | ||
| new ProductType() platform | "Your system platform (Eg. Windows XP SP3)" | This can be any value, i.e. “Windows 10”. |
| new ProductType() productName | "Product Name" | This is located in your email from Services Australia. |
| new ProductType() productVersion | "Product Version" | This is located in your email from Services Australia. |
| new ProductType() vendor = new QualifiedId() id | "Vendor Id" | This is located in your email from Services Australia. |
| new ProductType() vendor = new QualifiedId() qualifier | "Vendor Qualifier" | This is located in your email from Services Australia. |
Step 5.2. Modify the code sample to match your control names defined in step 3.
Step 6: Run your code
Step 6.1. Add the Add Patient button to the main screen and code it to open “Add Patient Form” using the following code.
private void btnAddPatient_Click(object sender, EventArgs e)
{
    AddPatient addPatient = new AddPatient();
    addPatient.Show();
}
Step 6.2. Run the application and test the IHI Lookup web service on the Add Patient form. To test, fill the mandatory patient demographic data to search for an IHI. You will be able to find test data in your test data pack provided by Services Australia.
Step 6.3. To force some errors, make changes to invalidate the following organisational values; Certificate Serial Number, HPI-O, Vendor Id, Vendor Qualifier and test the response with the IHI Lookup button. You will see the errors in the response from the HI Service as per the screenshot below.
Step 6.4. Make changes to invalidate consumer demographic details, i.e. familyName, givenName , dateOfBirth, or medicare card No and conduct the IHI Lookup. Familiarise yourself with the properties returned from the Web Service.
Further Reading
Refer to TECH.SIS HI Service guides from the Services Australia Health Software Portal for detailed specifications of each HI Service web service.
Step 7: Workflow
Important!
Read the following section carefully as it will describe additional requirements and will have a major impact on the usability of your software.
The code examples and UI screenshots throughout this guide will give you a good idea how to conduct IHI Lookups, however consideration should be made to when you conduct these lookups.
For the purposes of UC.010 and UC.015 it is reasonably straight forward because the patient demographic screen is open and the patient is being created or updated. The suggested behaviour is to incorporate the IHI Lookup when the ‘Save’ (or equivalent) button is pressed. This is an approach which will minimise interference with the user’s workflow and provide some additional data validation regarding the patient details. It is important that while there may be a designated ‘IHI Lookup’ button, the user should not need to push this separate button for the IHI to be applied to the local record.
If you are developing to connect to the My Health Record system, along with the IHI Lookups conducted for UC.010 and UC.015 you will also need to conduct IHI Lookups to meet the requirements outlined in the My Health Record Connecting Systems - Conformance Profile v1.6. For now please refer to Req No 019100 in Section 3.1 (this reference is valid as at v1.6 of the document). You will need to read the document in full to support meeting full conformance requirements.
Important!
Read Req No 019100 now.
This requirement states that your system must revalidate the IHI before use. The length of time before use should be a configurable period and determined by the local healthcare provider’s policy. Your system will likely set a default value for this period and can be set as 2-3 days.
These IHI Lookups are best performed as a background process off the back of existing workflows and should definitely not require users to follow a new workflow or press a button. Some suggested triggers for an IHI Lookup to meet Req 019100 might be:
- The evening before a scheduled appointment;
- An appointment is scheduled;
- The patient presents to the healthcare provider organisation’s waiting room;
- The healthcare provider opens the patient’s local health record or patient context.
While the HI Service does provide a batch search capability it is not recommended to perform batch lookups for all patients stored in the clinical information system unless there is a likelihood the patient will be visiting the healthcare provider organisation in the very short term. This is because patients are able to audit who has accessed their IHI and may raise concerns that their IHI has been accessed without the occurrence of a healthcare interaction with the organisation.
View All | Back | Next: IHI Lookup - Test Cases - HI Service Developer Guide 2