| Reading Online identification & registration (PRODA) Form completion Environment setup | 45 minutes 15 minutes 30 minutes 30 minutes |
| Total | 2 hours |
Overview
My Health Record integration is typically done in two steps:
- Connecting to the HI Service
- Connecting to the My Health Record system
It is useful to note that most of the steps for developer registration and accessing materials are done via Services Australia and their Health Systems Developer Portal, which you may be familiar with if you leverage the Medicare Online APIs. Most of the steps for accessing materials for My Health Record are done via the Australian Digital Health Agency (the Agency) and the Developer Portal (this site).
Getting started education modules
If you are interested in integrating your software with the My Health Record system, we recommend starting by reviewing our education modules. More information
Get Started
If you want to connect to the Healthcare Identifiers (HI) Service or integrate with My Health Record, follow the steps on the Get Started page.
Pre-requisites
Before you start your development, you will need to have completed the:
- HI Service Developer Registration and the
- My Health Record Developer Registration (Details below)
Important
Start both of these registrations now as there will be some turnaround time for responses and you will need test certificates to begin development.
My Health Record Developer Registration
Step 1. Download the My Health Record Software Vendor Welcome Pack (for initial product connection). You will only need the following file to begin with: Vendor Product Details Form.
To complete the form you will need to understand some basic aspects of the functionality you are developing including which web services you will access, which clinical document types you will upload, and which views you will display to the user. The development scope will be discussed briefly below, for the time being familiarise yourself with the rest of the form.
Step 2. Download the Application to Request a National Authentication Service for Health (NASH) Public Key Infrastructure (PKI) Test Certificate form which is a request for the test certificates required to access the My Health Record Software Vendor Test (SVT) Environment (NASH Test Certificates) and the HI Service SVT.
Complete this form at this step and send it to developerliaison@servicesaustralia.gov.au informing them of your interest to register your product for connection with the My Health Record system (or are implementing enhancements to your connected product). If you have already completed the form in step 1 then you can include that also. It may take a few days for NASH Test Certificates to be issued.
Step 3. Once you have received your NASH Test Certificates you will then be ready to setup your environment as per the steps below and run your first code (in our next developer guide).
HI Service Developer Registration
To gain access to the HI Service Software Vendor Test (SVT) Environment you will need to register on the Health Systems Developer Portal provided by Services Australia.
For how to register for the HI Service visit: HI Service - Registration and Certificates
HI Service Development Scope
When developing to connect to the HI Service it is important to consider what functionality you will be building. These developer guides focus on important functionality and use cases.
You will be guided on how to retrieve an IHI using patient demographics (IHI Lookup) and how to retrieve a healthcare provider individual's HPI-I using their AHPRA number and name.
For a complete list of HI Use Cases, please see the HI Service Conformance Profile.
My Health Record Development Scope
To register as a My Health Record developer using the Vendor Product Details Form mentioned above you will need to understand what you wish to build. Every software vendor may wish to build something slightly different. Your scope can change during development and the completed form is just used by the Agency as a guide to assist you. Continue reading for help to complete question 10. Supported web services on the form.
The first item to consider is whether your users will need to contribute (upload) to the My Health Record or just view content. Most developers would incorporate functionality for both. When viewing content will your users only need to download clinical documents or would you like to display My Health Record Views. My Health Record Views provide an easy way to display consolidated clinical information such as a Prescription & Dispense View. We recommend incorporating My Health Record Views.
| Web Service | For Viewing MHR Content | For displaying MHR Views | For uploading |
|---|---|---|---|
| DoesPCEHRExist | Yes | Yes | Yes |
| GainPCEHRAccess | Yes | Yes | |
| ITI-41 Provide & Register Document Set - b | Yes | ||
| RemoveDocument/DeregisterDocument | Yes | ||
| ITI-43 Retrieve Document Set | Yes | Yes | |
| ITI-18 Register Stored Query | Yes | Yes | |
| Register PCEHR | |||
| CIStoNPP * | |||
| GetChangeHistoryView | |||
| GetAuditView | |||
| GetRepresentativeListView | |||
| GetIndividualDetailsView | |||
| getView | Yes | ||
| SearchTemplate | |||
| GetTemplate |
* If your users are only interested in viewing My Health Record content, you may wish to use the CIS to NPP connection method. Other limitations apply. More information can be found here: CIS to NPP v1.0
Question 14.2 asks which types of clinical documents your system will upload to the My Health Record system. The table below gives some high-level advice as to which clinical documents may be relevant for your system based on the sector of your users. For further information you may wish to read more information about each clinical document type by clicking the link.
✓✓ Highly Recommended ✓ Recommended
| Uploading | GP | Pharmacy | Pathology | Diagnostic Imaging | Allied Health |
|---|---|---|---|---|---|
| Shared Health Summary | ✓✓ | ||||
| Event Summary | ✓✓ | ✓ | ✓✓ | ||
| eHealth Prescription Record | ✓✓ | ||||
| eHealth Dispense Record | ✓✓ | ||||
| eHealth Pathology Report | ✓✓ | ||||
| eHealth Diagnostic Imaging Report | ✓✓ |
| Vi/node/5522ewing | GP | Pharmacy | Pathology | Diagnostic Imaging | Allied Health |
|---|---|---|---|---|---|
| Health Record Overview | ✓✓ | ✓ | ✓ | ✓ | ✓ |
| Medicare Overview | ✓✓ | ✓ | ✓ | ✓ | ✓✓ |
| eHealth Pathology Report View | ✓✓ | ✓ | ✓✓ | ✓ | ✓✓ |
| eHealth Diagnostic Imaging Report View | ✓✓ | ✓ | ✓ | ✓✓ | ✓✓ |
| eHealth Prescription & Dispense View | ✓✓ | ✓✓ | ✓ | ✓ | ✓✓ |
| eHealth Medicines View ** | ✓✓ | ✓✓ | ✓ | ✓ | ✓✓ |
** The eHealth Medicines View is not a document that is uploaded by clinical information software. It can only be downloaded via the document list.
Certificate Setup
Within a few days you will receive your NASH Test Certificates and test data for the HI Service and My Health Record system and can begin building your implementation by connecting to the Software Vendor Test (SVT) Environments. You may use your NASH Certificates for both services.
Setup NASH CA certificates on a Windows environment
Step 1. Unzip the certificates zip file to extract all of the certificate files. the ZIP file will look similar to the screenshot below.

Step 2. First we will install the Certificate Authority (CA) certificates. In the screenshot above these are tmaoca.crt and tmarca.crt. Install each CA certificate following the steps below.
a. Double click on the CA certificate, the installation window will appear.
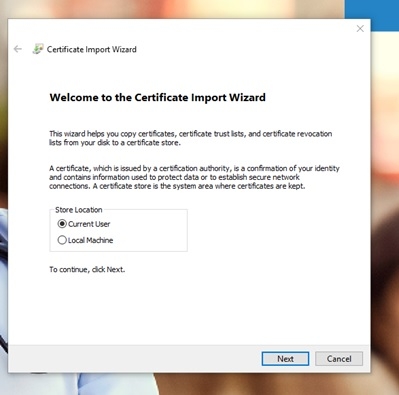
b. Click Next and select the Place all certificates in the following store option.
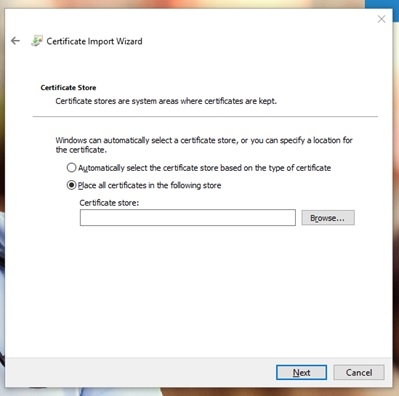
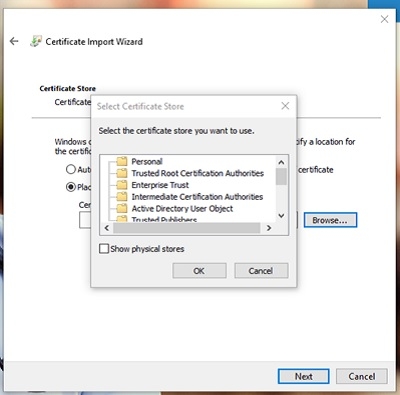
c. Click Browse… and choose Trusted Root Certification Authorities as the Certificate Store.
d. Click next and finish installation.
Step 3. Repeat step 2 to install each certificate.
Setup NASH Organisation certificate (Personal Information Exchange)
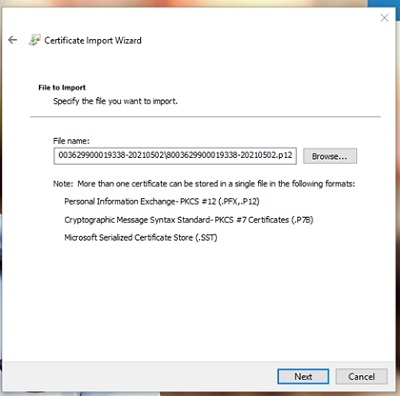
Step 1. Install the NASH private key certificate (typically named fac_sign.p12 file) by double clicking the file.
Step 2. Click Next and enter the Password for private key provided by Services Australia.
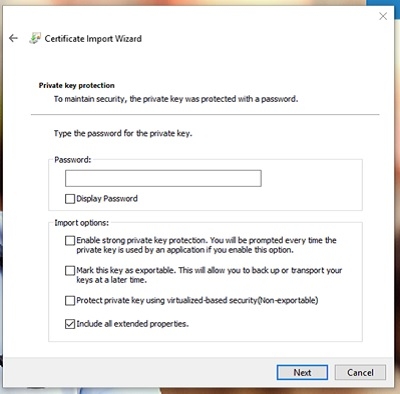
Step 3. Click Next and select the Place all certificates in the following store option.
Step 4. Click Browse… and choose Personal for certificate store and click OK.

Step 5. Click next and finish installation.
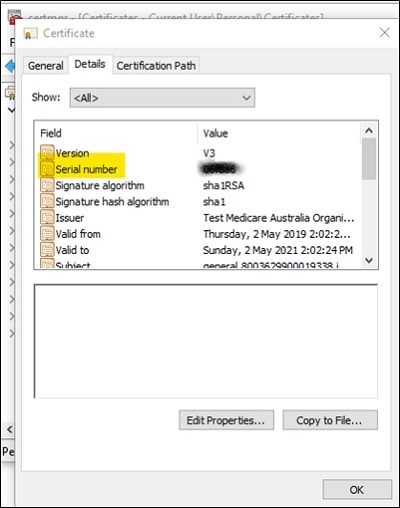
Find the Certificate Serial Number
To connect to the HI Service and My Health Record system you will need a certificate for TLS and signing the Header. To identify the certificate to use in your code, you will need the serial number of the certificate. Follow the steps below to retrieve the serial number.
Step 1. Go to Manage User Certificates from the Windows Start Menu.
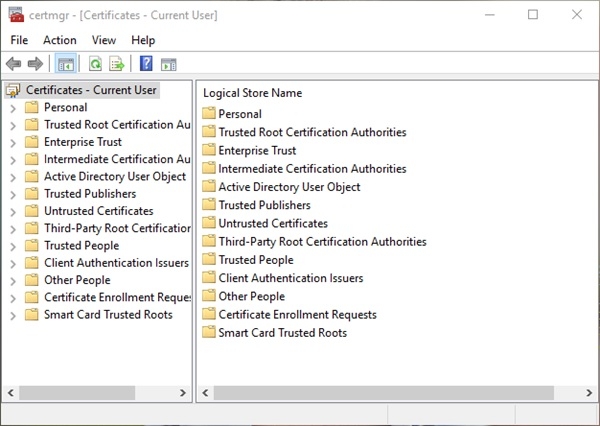
Step 2. Navigate to Personal -> Certificates to verify that the certificate is installed.
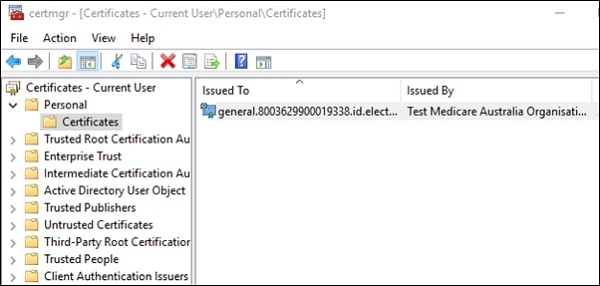
Step 3. Double click on the certificate to view the details.
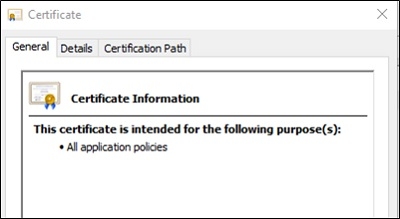
Step 4. In the Details tab, you can find the Certificate Serial number required in developer guides.
Code sample to load the certificate
The following code has been provided to be reused for loading the certificate when required. This code sample will be provided again when required in the next guide.
using System.Security.Cryptography.X509Certificates;
X509Certificate2 cert = X509CertificateUtil.GetCertificate(
        Certificate_Serial,
        X509FindType.FindBySerialNumber,
        StoreName.My,
        StoreLocation.CurrentUser,
        true);
return cert;
}
User production Certificates in your software
The steps above will prepare your development environment to connect to the SVT environments. Your users however will receive production environment certificates and you will likely want to simplify the way which they load these certificates into your software.
If you already connect to Medicare APIs then you will likely already have a UI screen which allows the user to load certificates. You may want to leverage this same process to allow them to load their NASH certificates. If you do not already have functionality to load production certificates via your UI you will want to investigate this.
Important!
The CA certificates for production environments are different from the SVT. Therefore you will need to install production CA certificates for your users. These certificates can be found at https://www.certificates-australia.com.au/.
Conclusion
You should now be familiar with the HI Service and My Health Record system. You should be registered as a developer for both environments and have your local development environment set up with certificates. You should also understand the scope of your development and be familiar at a high level with your testing obligations.
In the next guide we will begin our first calls to the HI Service web services.