Reading & Development: 2 hours
Quick Intro
You should have already read the previous guide Introduction and Registration, otherwise you will not have the resources and background that you will need to continue this guide.
Within these guides we will demonstrate the functionality of the FHIR® Gateway using Xamarin.Forms in Visual Studio and the Android Emulator. If you are using a different language or development platform you should still be able to leverage this content for your purposes.
In this tutorial you will;
- Prepare the CA certificates required for the MyGov test environment
- Create a new FHIR® Gateway project in Visual Studio
- Configure the project
- Develop MyGov authentication functionality
- Have a MyGov authentication token allowing you to securely retrieve My Health Record content
There is a sample desktop application to demonstrate the My Health Record FHIR® Client APIs using C# on the Agency’s GitHub, you may wish to use that application as a resource also.
Prerequisites
- Microsoft Visual Studio 2019/2017 with Mobile Development framework (Xamarin.Forms) Installed
- My Health Record FHIR® Gateway client connectivity settings (Client ID, Client Secret, App Version). These settings are sent to you after you have completed the registration step in the previous guide.
- Familiarity with Xamarin.Forms using C# and XAML.
Important
If you have not already done so, you should download the My Health Record FHIR® Gateway specifications package and familiarise yourself with the package contents. The API Specification.pdf file contained in that package has a graphical authentication flow in Section 3.1 which you should view now.
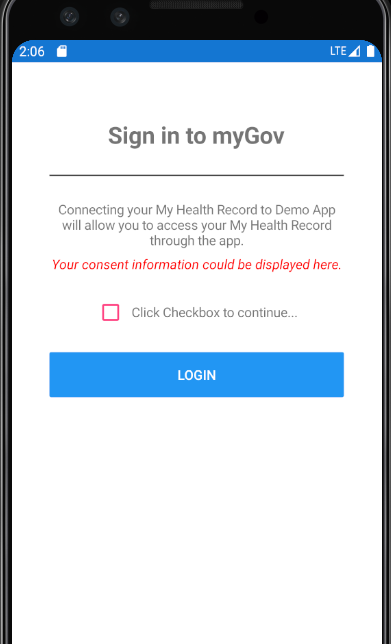
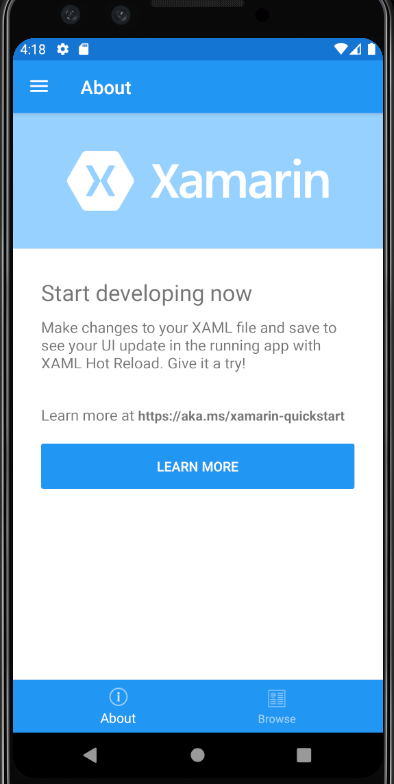
The following screenshot is an example of your demo app interface. The button click will begin the MyGov authentication process and your consent information for your users will be displayed as per the Consent Guidelines document.
Important
Take this moment to ensure you have the Client Id, Client Secret and App Version as per the table below. They are required authentication settings (OAuth 1.0 and OAuth 2.0)
| Client Id | Client identifier for the application (aka App ID) |
| Client Secret | Client secret for the application (aka App secret) |
| App Version | This is the application version as presented to the user. This is mandatory. |
Step 1: CA Certificates
To test your application, you will be required to authenticate using the MyGov test environment. To access this environment, you are required to install the CA certificates on your mobile emulator/device browser. Use the following instructions to retrieve and install the certificates on an Android emulator or device. You will need to conduct similar steps if you are building this test application for an iOS device/emulator.
1. Visit the link https://test.auth.my.gov.au/las/login?execution=e1s1 on your desktop browser. In Chrome, navigate to Developer Tools (F12) -> Security tab and view the certificates. Different browsers have slightly different option names. Note that this site may appear in your browser as unsecure.
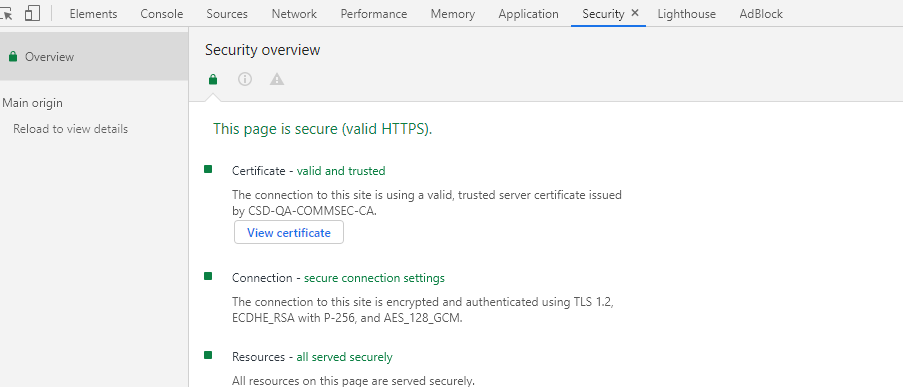
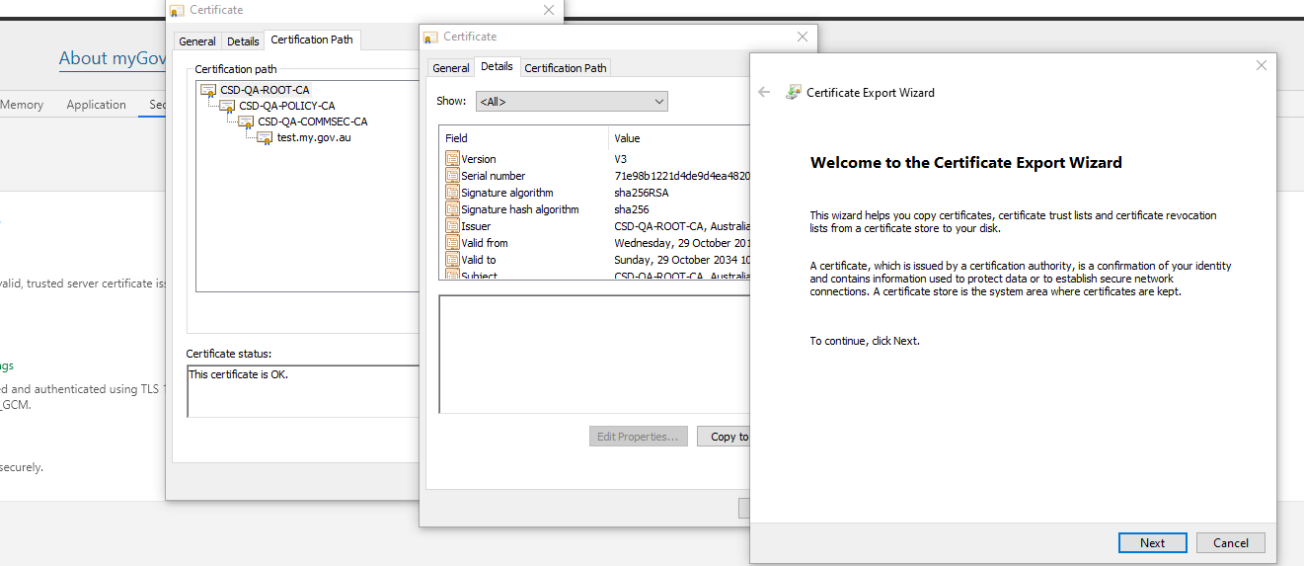
2. Click the View Certificate button on each of the results to save the trusted chained certificates onto the local file system using the export window. If prompted, select the .CER extension. The screenshots below can be used as a guide.
3. Copy the certificate files onto the Android emulator/device using the following commands to install the certificates one by one.
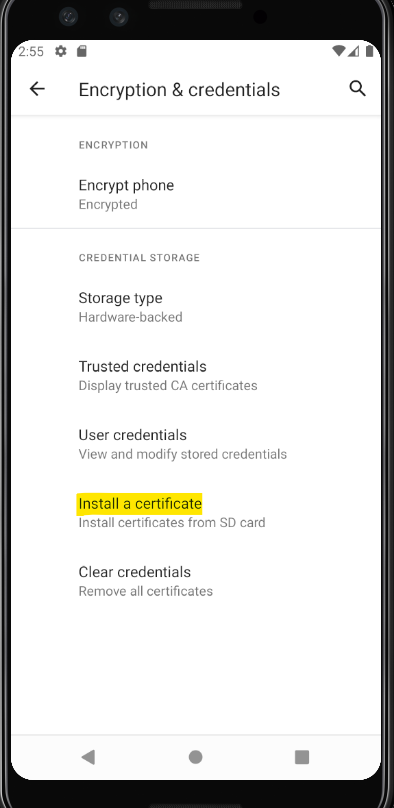
adb push path_to_cert\ca_cert_file.cer /sdcard/ca_cert_file.cerBefore installing the certificates on the device, you will need to enable device lock screen in your emulator/device security settings.
Finally, install the certificates using the Settings app on the emulator/device as shown in the screenshot below.
Step 2: Project setup
Please ensure you have installed the additional Xamarin mobile development framework using Visual Studio Installer. Please visit this Microsoft link to install it.
1. Create a new project using the Visual Studio template Mobile App (Xamarin.Forms).
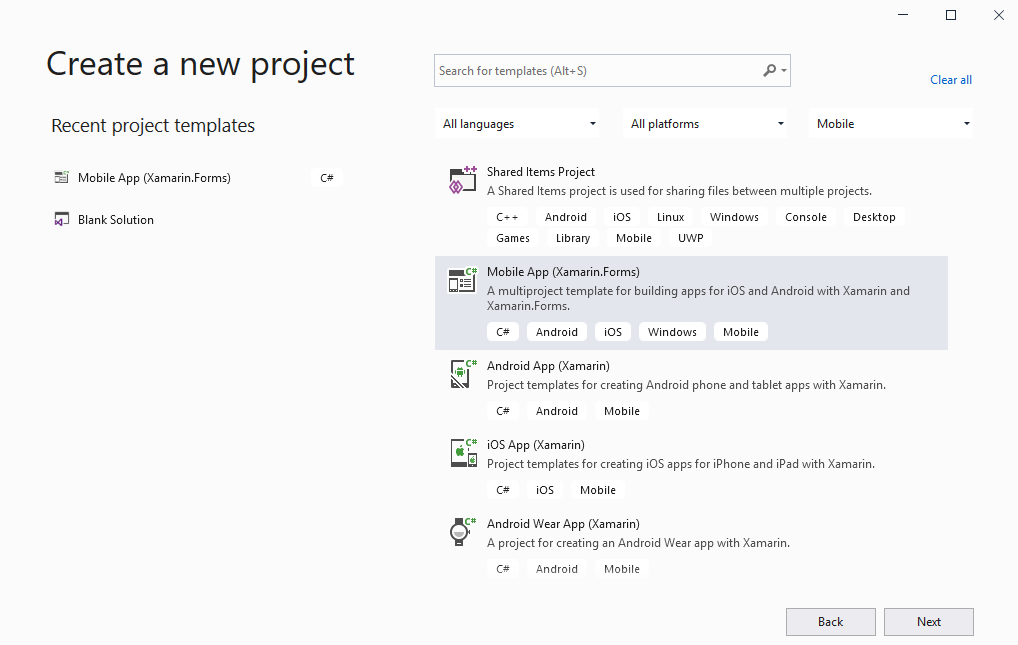
2. Provide the Project name and Solution name, select Location, and click Create.

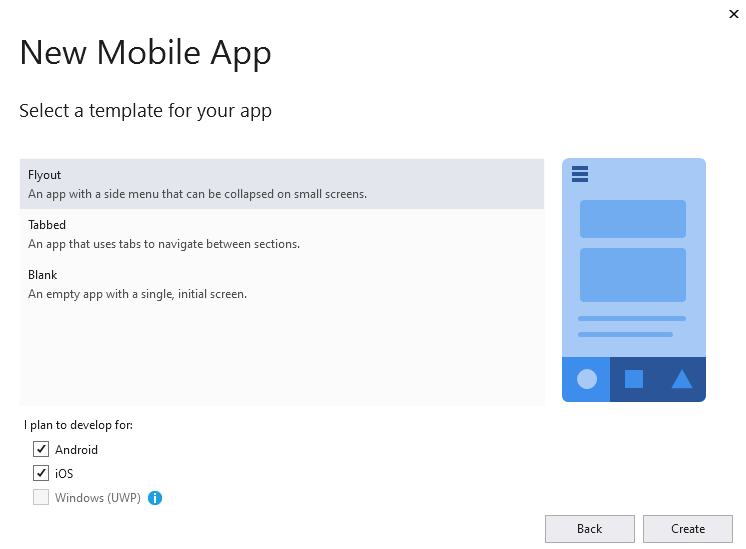
3. Select a Template for the demo app. We have used Flyout and will be building on our functionality in each guide by adding additional Flyout menu options.
Step 3: Configure your App settings
First, we will add the client settings required to connect and authenticate via the MyGov Sign-in page.
1. Open the file App.xaml.cs from the Solution explorer.
2. Copy the following code and paste it into the class.
// MHR FHIR Connection Settings
public const string ClientId = "";
public const string ClientSecret = "";
public const string AppVersion = "2.2.0";


// MHR FHIR gateway test endpoints.
public const string FhirApiEndPoint = "https://apinams.svt.gw.myhealthrecord.gov.au/fhir";

public const string FhirApiVersion = "v2.0.0";
3. Replace the values Client Id, Client Secret, and App Version which have been provided to you.
Step 4: Authenticating with MyGov
By default, the Flyout project template contains basic pages such as Login and About.
We will utilise the existing UI pages to ensure we can progress quickly to My Health Record development.
1. Open the App.XAML file and modify the <FlyoutItem> code as per below code.
<FlyoutItem FlyoutDisplayOptions="AsMultipleItems">
        <ShellContent Route="LoginPage" ContentTemplate="{DataTemplate local:LoginPage}" />
        <ShellContent Title="My Health Record" Icon="tab_about.png" Route="AboutPage" ContentTemplate="{DataTemplate local:AboutPage}" />
            </FlyoutItem>
2. Comment out the LoginPage Route item as we cannot have two Routes with the same name.
<!--<ShellContent Route="LoginPage" Shell.FlyoutBehavior="Disabled" ContentTemplate="{DataTemplate local:LoginPage}" />-->3. Open the Login.XAML and modify UI as per code below inside the <ContentPage.Content> tag.
<ContentPage.Content>

        <StackLayout VerticalOptions="FillAndExpand"  Padding="40">

            <Label Text="Sign in to myGov" Margin="0, 20, 0, 20" Style="{StaticResource PageHeader}"
                VerticalOptions="Start"
                HorizontalOptions="CenterAndExpand"
                HorizontalTextAlignment="Center"/>
            <BoxView HorizontalOptions="FillAndExpand" HeightRequest="1" Color="#222222" Margin="0, 0, 0, 20"/>

            <Label Text="Connecting your My Health Record to Demo App will allow you to access your My Health Record through the app." HorizontalTextAlignment="Center" />
            <Label Text="Your consent information could be displayed here." HorizontalTextAlignment="Center" TextColor="Red" FontAttributes="Italic" />
            <StackLayout Margin="20"
                 Orientation="Horizontal"
                 HorizontalOptions="Center">
                <CheckBox x:Name="ChkBoxConsent" VerticalOptions="Center" />
                <Label Text="Click Checkbox to continue..." VerticalOptions="Center" />
            </StackLayout>


            <Button x:Name="BtnLogin" VerticalOptions="Center" Text="Login" Clicked="BtnLogin_Clicked" />
        </StackLayout>

    </ContentPage.Content>
In the above code, the main label with the text “Sign in to MyGov” is using the static style, so we will add the page header style in the main App file.
4. Open the App.xaml file and add the following code inside the <ResourceDictionary> tag.
<Style x:Key="PageHeader" TargetType="Label">
  <Setter Property="FontSize" Value="25" />
  <Setter Property="FontAttributes" Value="Bold"/>
</Style>
5. Install the Xamarin.Auth which provides the OAuth (1.0 and 2.0) authentication facility using the NuGet Package manager/console.
Install-Package Xamarin.Auth5. Import the Xamarin.Auth namespaces in the 2 lines below.
using Xamarin.Auth;
using Xamarin.Auth.Presenters;
Note
By default, Xamarin flyout template is using the MVVM pattern in which UI pages directly bind with View Models. However, we will use the code behind file to attach the event handlers and code.
7. The code below will use the Login button to commence the authentication mechanism using OAuth Authenticator. Open the Login.XAML.cs file and Add the BtnLogin_Clicked method using the following code.
private async void BtnLogin_Clicked(object sender, EventArgs e)
{
if (ChkBoxConsent.IsChecked)
{
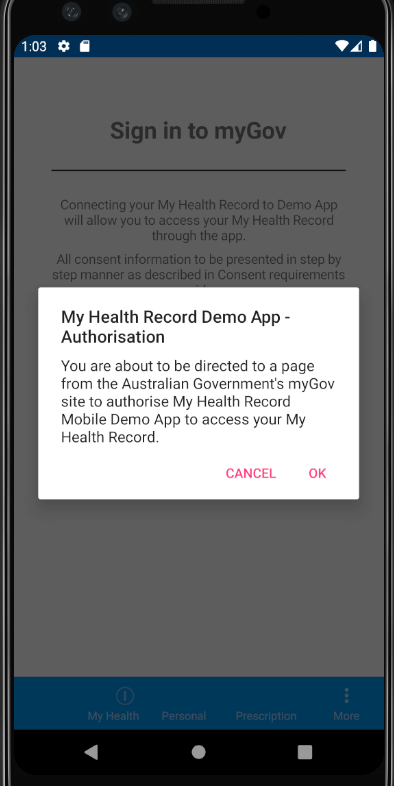
// User Alert before going to MyGov Sign in page.
bool response = await Application.Current.MainPage.DisplayAlert("My Health Record Demo App - Authorisation", "You are about to be directed to a page from the Australian Government's myGov site to authorise My Health Record FHIR Demo App to access your My Health Record.", "Ok", "Cancel");
if (response)
{
var auth = new OAuth2Authenticator
(
clientId: App.ClientId,
clientSecret: App.ClientSecret,
scope: "https://localhost:8090/pcehr",
authorizeUrl: new Uri("https://apinams.svt.gw.myhealthrecord.gov.au/api/oauth/v1/authorize/login"),
redirectUrl: new Uri("https://localhost/oauth_callback"),
accessTokenUrl: new Uri("https://apinams.svt.gw.myhealthrecord.gov.au/api/oauth/v1/token"),
null, false
// switch for new Native UI API
// true = Android Custom Tabs and/or iOS Safari View Controller
// false = Embedded Browsers used (Android WebView, iOS UIWebView)
// default = false (not using NEW native UI)
);
auth.AllowCancel = true;
auth.Completed += AuthOnCompleted;
auth.Error += AuthOnError;
auth.ShowErrors = false;
auth.Title = "Sign in with myGov";
_oAuthLoginPresenter = new OAuthLoginPresenter();
_oAuthLoginPresenter.Completed += OAuthLoginPresenterOnCompleted;
_oAuthLoginPresenter.Login(auth);
}
}
}8. Add the following additional methods to action on error and success.
private async void AuthOnError(object sender, AuthenticatorErrorEventArgs e)
{
    await Application.Current.MainPage.DisplayAlert("My Gov Sign In Error", e.Message,"Cancel");
}

private void OAuthLoginPresenterOnCompleted(object sender, AuthenticatorCompletedEventArgs e)
{
}

private async void AuthOnCompleted(object sender, AuthenticatorCompletedEventArgs e)
{
    if (e != null && e.Account != null && e.IsAuthenticated)
    {
        var accessToken = e.Account.Properties["access_token"];
        await Shell.Current.GoToAsync($"//{nameof(AboutPage)}");

    }
    else
    {

    }
}
Important
Next step is a workaround solution to counter NullReferenceException as by default oAuthPresensenter doesn’t get initialized and raise exception on runtime.
9. Use the following code for your Android and iOS project files to counter the NullReferenceException.
Android
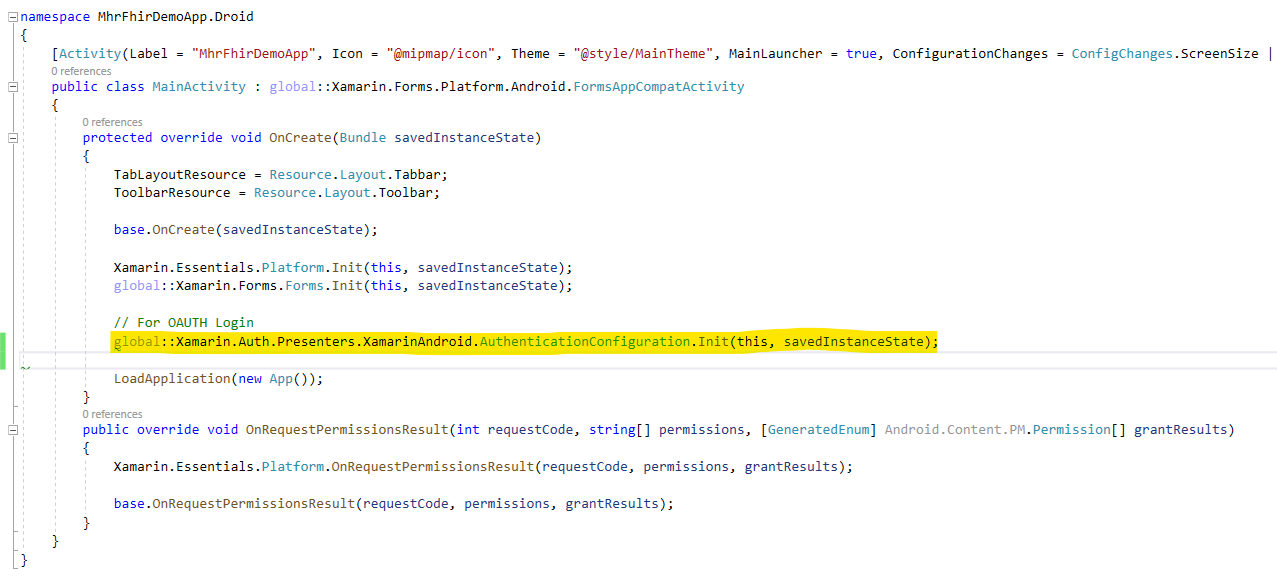
Add the following code inside the MainActivity class file of the Android Project to initialize the Xamarin.Auth classes.
// For OAUTH Login
               global::Xamarin.Auth.Presenters.XamarinAndroid.AuthenticationConfiguration.Init(this, savedInstanceState);
The final Android class file will appear as per the screenshot below.
iOS
Add the following code into the AppDelegate file inside the iOS project as shown in the code block and screenshot below.
// For OAUTH Login
           global::Xamarin.Auth.Presenters.XamarinIOS.AuthenticationConfiguration.Init();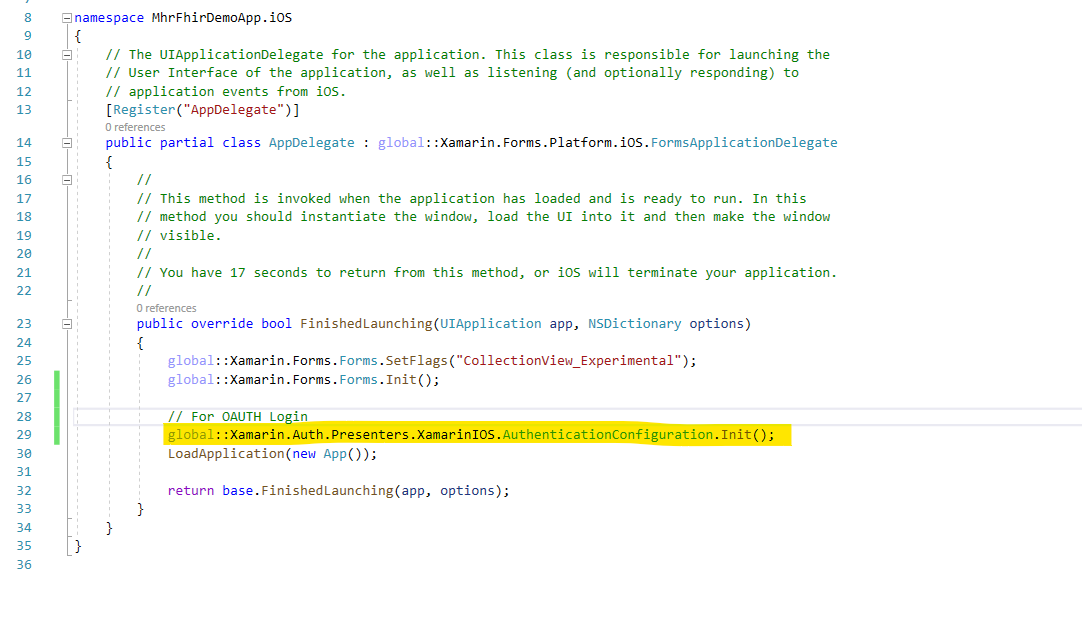
10. Run the App using the Android Emulator and test the authentication as outlined in the next section.
iOS
Add the following code into the AppDelegate file inside the iOS project as shown in the code block and screenshot below.
// For OAUTH Login
global::Xamarin.Auth.Presenters.XamarinIOS.AuthenticationConfiguration.Init();
Step 5: Testing authentication
With your app running in the Android Emulator you should be able to step through the authentication flow as shown in the screenshots below.
1. Check the consent checkbox and tap Login.
2. Tap OK to authorise the app to access the test patient’s My Health Record.
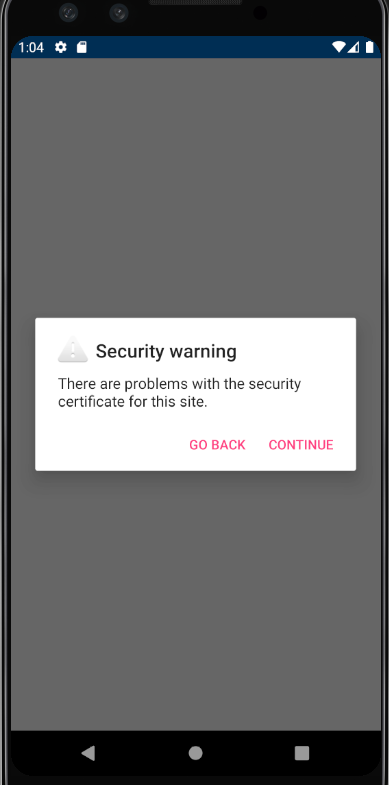
3. The certificates used in the Software Vendor Test (SVT) environment may display as unverified and therefore the test environment may throw this error which can be disregarded.
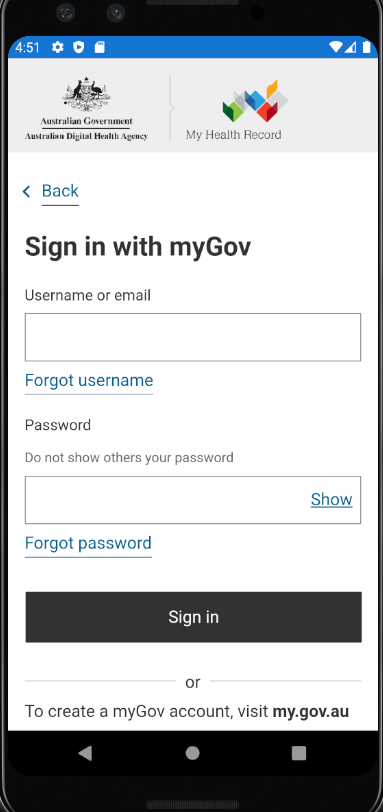
4. Provide a valid Username and Password from the test data you have received in your Test Kit.
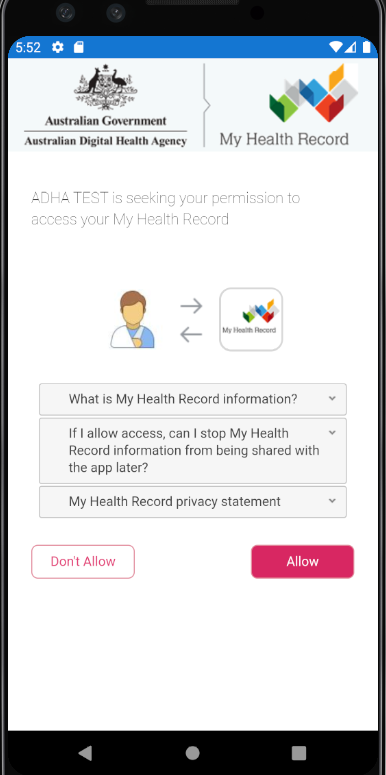
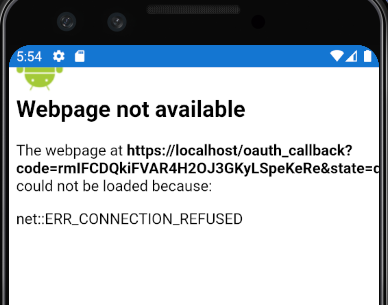
5. Click the Allow button to authorise the My Health Record Demo App to access the information of the test patient, it will redirect momentarily to the URI given in the App file. This will likely be a URL on your organisation’s server or website.
6. If you run the app in Debug mode, you can pause the app and check the authentication token.
var accessToken = e.Account.Properties["access_token"];Step 6: The authentication token
Before we can retrieve any patient information from the My Health Record system, we will first store the access token securely as per the security guidelines.
1. Add the string constant in the App.xaml.cs file to use as Authentication token key.
public static string AuthTokenKey = "mhrAuthToken";2. Add the following highlighted code before navigating to About Page inside the AuthOnCompleted (LoginView.Model.cs)
var accessToken = e.Account.Properties["access_token"];

await SecureStorage.SetAsync(App.AuthTokenKey, accessToken);

await Shell.Current.GoToAsync($"//{nameof(AboutPage)}");
This will securely save the token with the provided key.
Conclusion
This developer guide introduced the My Health Record FHIR® Gateway and demonstrated the MyGov authentication process to retrieve an access token for the user. This token can now be used to retrieve patient information from the My Health Record system.
View All | Back | Next: Patient Details and Record List - My Health Record FHIR® Gateway Developer Guide 3